
Installing a carved marble fountain is not like installing a garden ornament — it’s closer to a small piece of structural masonry engineering. A three-tier fountain can weigh several tons once fully assembled, and every ring, basin, and shell must be leveled, sealed, and plumbed correctly, or the finished piece will leak, crack, or simply look wrong.
Having assembled and tested hundreds of fountains in our own yard before they ship out, we’ve put together this guide to walk you through the real installation sequence — including the two most common ways to install the pump, and when to use each one.
Step 1: Confirm the Foundation and Mark the Layout
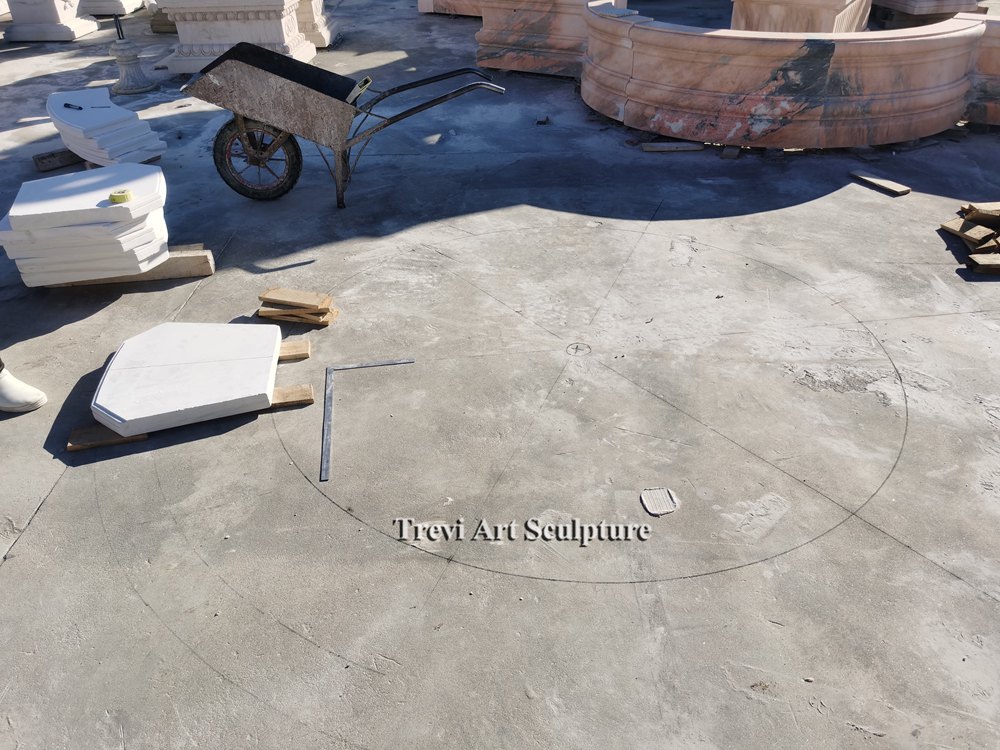
Before a single stone touches the ground, the concrete pad or foundation needs to be poured and cured, with a slight fall (about 1–2%) toward a drain point so the basin can be emptied for winterizing or cleaning. Once the pad is ready, snap a centerline and use a radius string or trammel arm to scribe the true center point and the outer circumference directly onto the concrete — exactly the way you’d lay out any large circular structure.
This chalk-line circle becomes your reference for every ring of stone that follows, and it’s also where you’ll rough in the electrical conduit and water supply/drain lines, since these need to come up through the slab before the base ring is set.
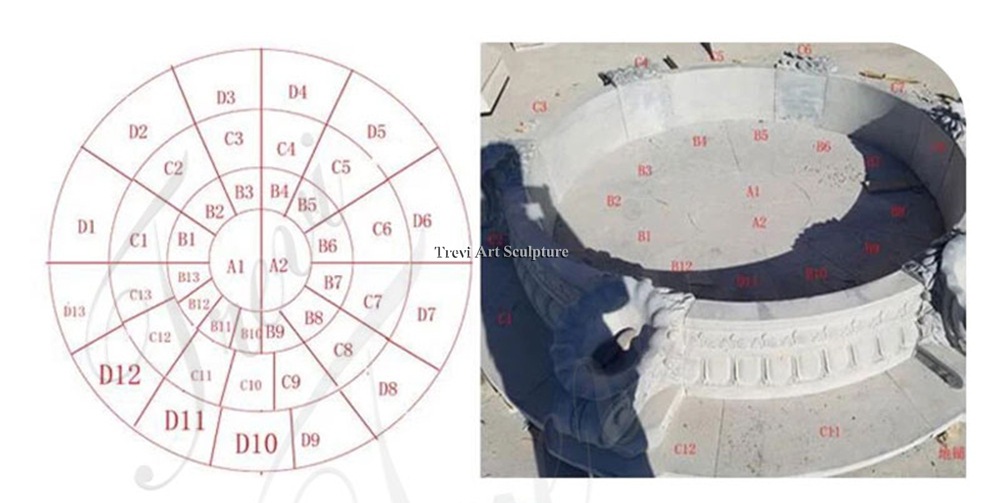
A simple radial diagram — dividing the circle into labeled segments — is extremely useful here. Numbering each marble segment against the layout drawing before the crane ever picks up a piece prevents mismatched joints later, especially on fountains with scalloped or lobed basin edges rather than a plain circle.
Step 2: Assemble the Base Ring (Lower Basin)
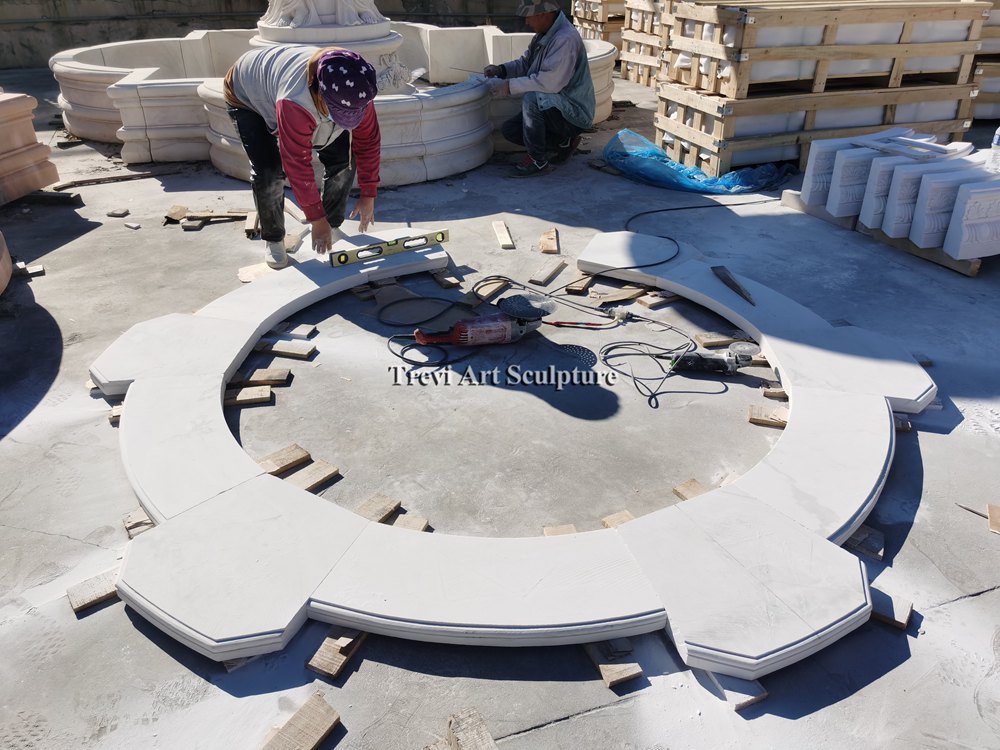
The base ring — usually the heaviest and largest-diameter component — goes down first. It typically ships in 6 to 12 curved segments (plus straight infill pieces at any lobes or scallop points). Working from the marked circle:
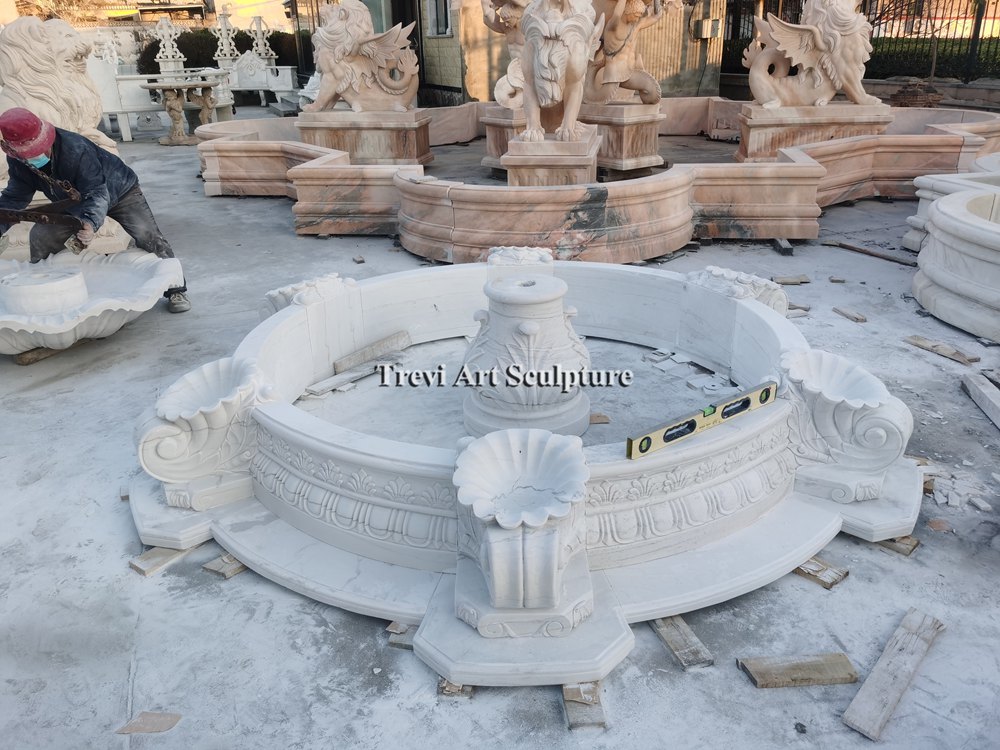
- Dry-fit each segment along the scribed line, checking radial alignment with a set square and level before any adhesive goes down.
- Shim each joint with thin wood or plastic shims to hold a perfectly level top surface — even a few millimeters of tilt will be very visible once water is running.
- Bond adjoining segments with a color-matched marble epoxy or polyester resin adhesive, not cement, to avoid staining and to allow a thinner, tighter joint line.
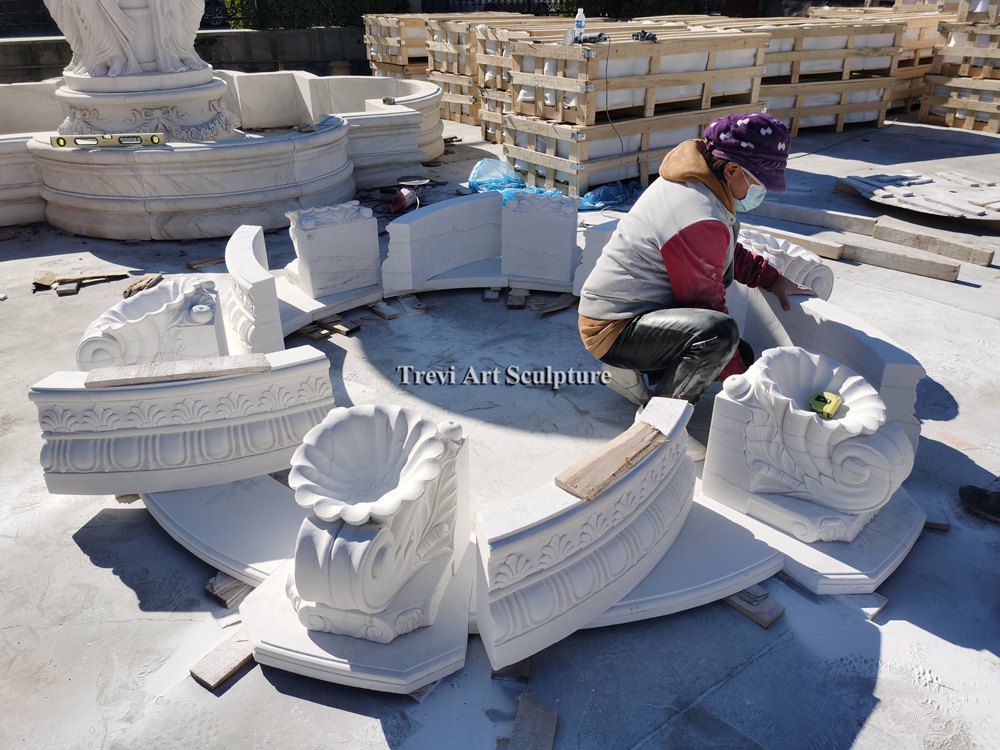
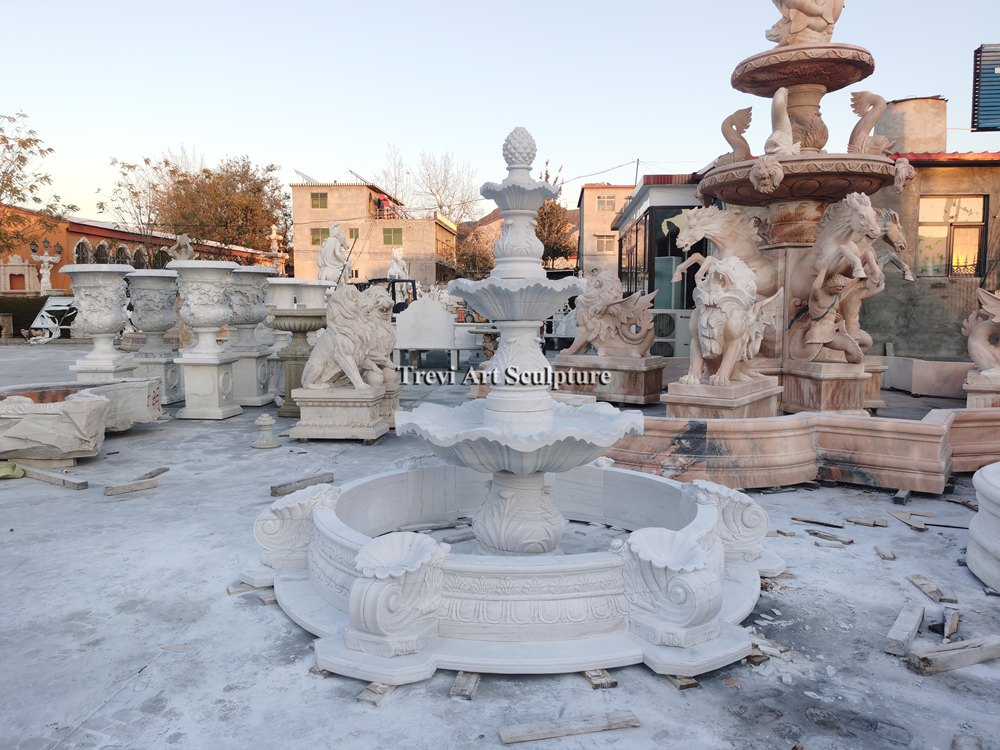
- Where the design includes shell-shaped corner basins or scroll brackets (a very common Baroque-style detail), these usually land at the “elbow” points between straight and curved segments and should be set and leveled before the resin fully cures, so you can still make micro-adjustments.
Step 3: Stack the Pedestal and Upper Tiers
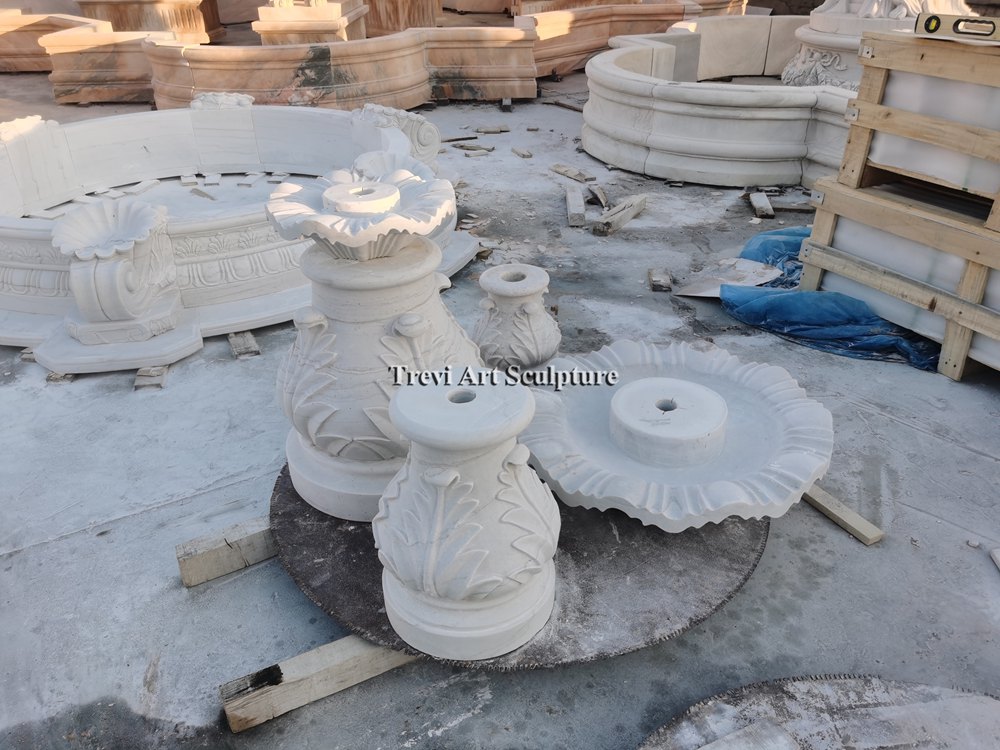
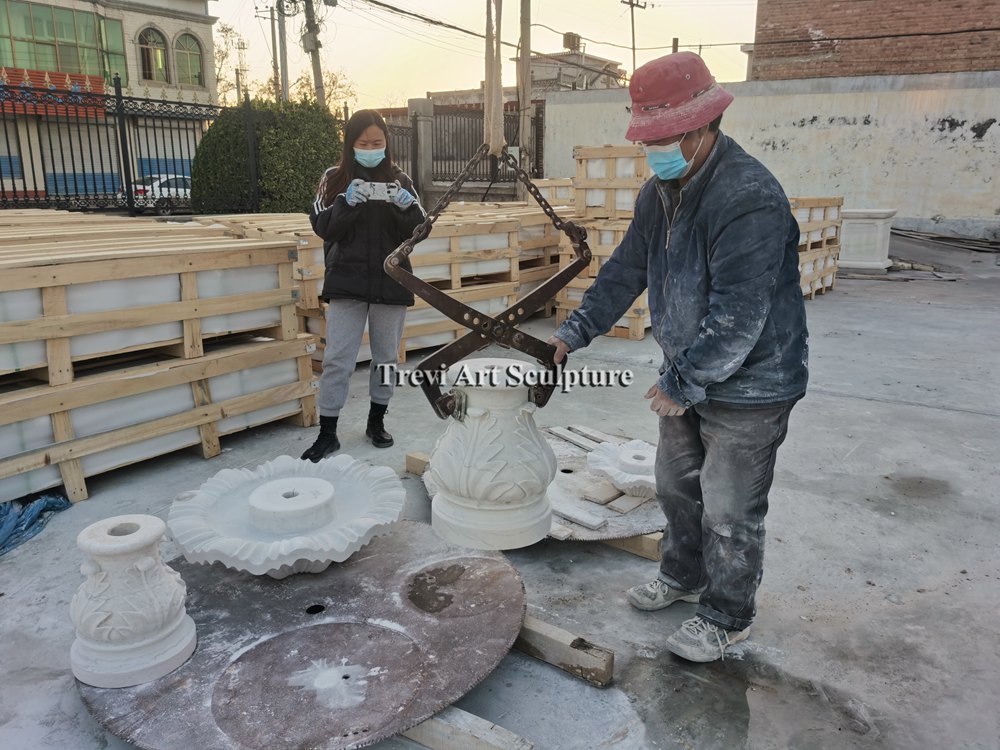
With the base ring level and cured, the central column goes up next, tier by tier — pedestal base, fluted or carved column drum, upper basin(s), and finial. Unlike the base ring, these pieces can’t be dragged or muscled into place by hand — even a mid-size column drum or basin can weigh several hundred kilograms, and it has to be lowered onto a wet adhesive bed with millimeter-level accuracy. This is where proper lifting equipment becomes essential, not optional:
- A stone-lifting clamp (the scissor-type clamps you’d use on a basin or urn) or a set of nylon slings routed through pre-drilled lifting points is used to raise each tier smoothly and set it down dead level in one motion — repeated lifting and adjusting once a piece touches the adhesive bed will smear the joint and throw off the level.
- The taller and heavier the fountain, the more capable the crane needs to be — not just in maximum load, but in reach and precision at height. A single-tier garden fountain can often be set with a small mobile crane or even an engine hoist, but a tall three-tier fountain with a heavy top basin and finial requires a larger truck-mounted or crawler crane with a skilled operator who can hold a suspended stone piece steady while it’s guided into position by hand.
- Once a tier is lifted into place, it should still be doweled with a stainless steel or fiberglass pin set in epoxy, not just stacked dry — marble has almost no tensile strength across a joint, so the dowel is what actually keeps a top-heavy fountain from shifting in wind or during a light impact.
- Set each joint with a thin, even bed of clear marble adhesive — thick beds crack and show as gray lines once cured.
- Check for plumb (not just level) at every tier, using a long level held vertically against the column, since a lean at the base is amplified by the time it reaches the top basin.
Because of the combination of weight, height, and precision required, large multi-tier marble fountains really aren’t a job for a general contractor working alone — they call for an experienced installation team.
This is why we provide our own professional on-site installation team for large fountain projects: the same crew that assembles and pressure-tests each fountain in our yard before it ships can travel to install it on site, so the client isn’t left trying to source a crane operator and stone setters locally who have never handled a piece like this before.
Step 4: Install the Pump — Two Methods
This is the step where the design decisions really matter, and it’s also where we get the most questions from clients. There are two standard approaches, and both appear in our own working drawings.
Method A: Pump Housed Inside the Central Column
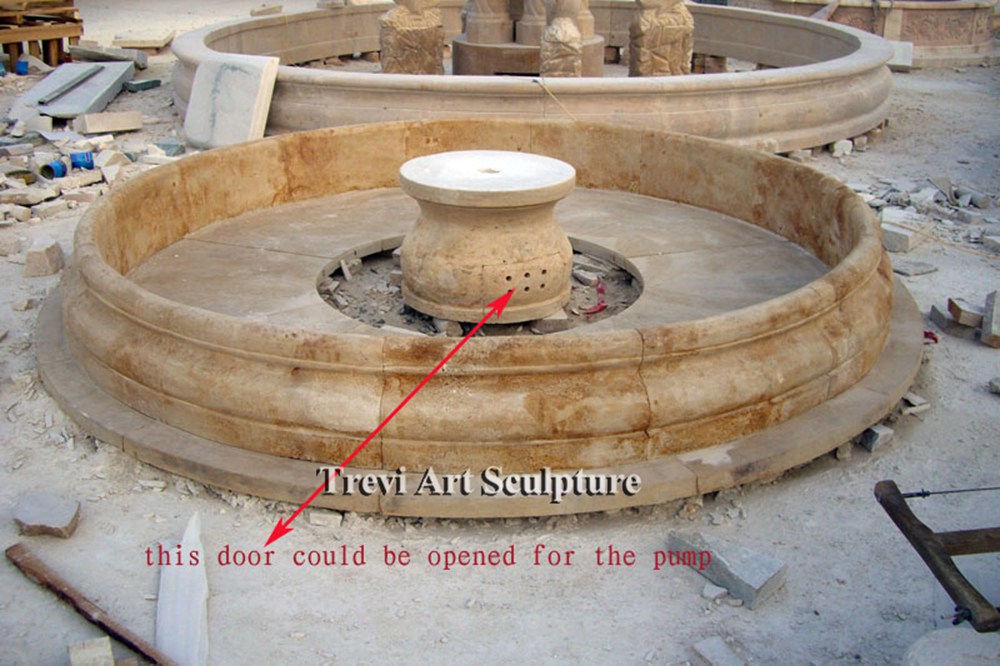
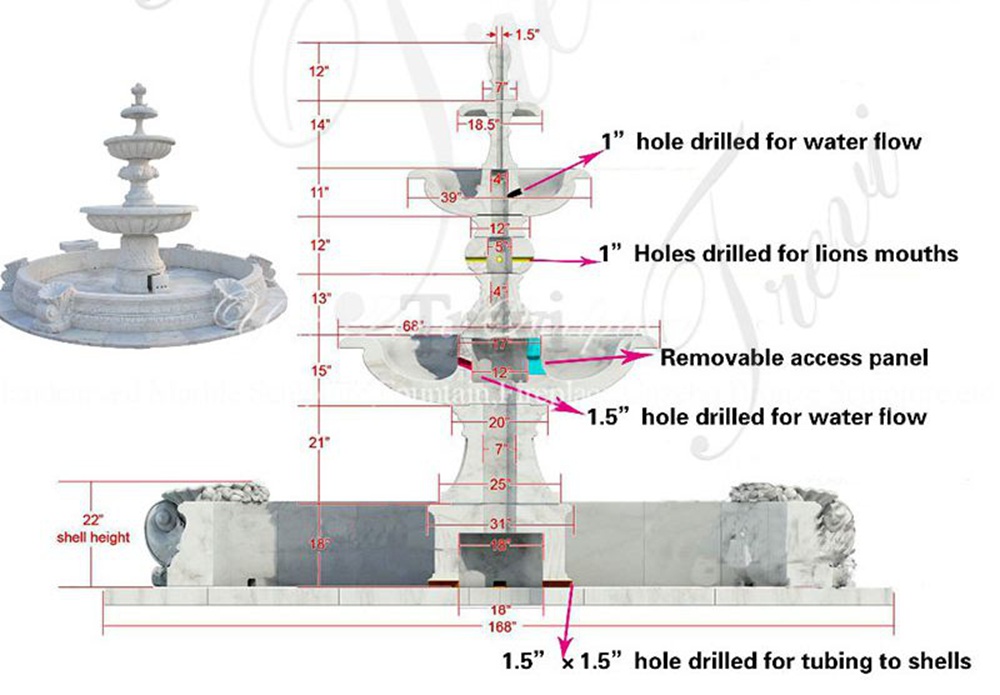
Many center-column fountains are cast or carved with a small internal cavity at the base, accessed through a removable stone or covered access panel — you can see this in our own fountains, where a plug or capstone section lifts out to expose a chamber with drilled holes for the water-supply riser and the wiring.
How it works:
- The submersible pump sits inside this cavity, in the same footprint as the column base, fully hidden.
- A vertical riser pipe (often the 1″–1.5″ holes you’ll see drilled through the column drums, tiers, and finial in the shop drawings) carries water up to the top basin or to the “lion mouth” or other decorative spouts.
- The access panel can be lifted for maintenance without disturbing the surrounding basin water or the paving.
Method B: Pump Housed in a Buried Vault Under the Paving
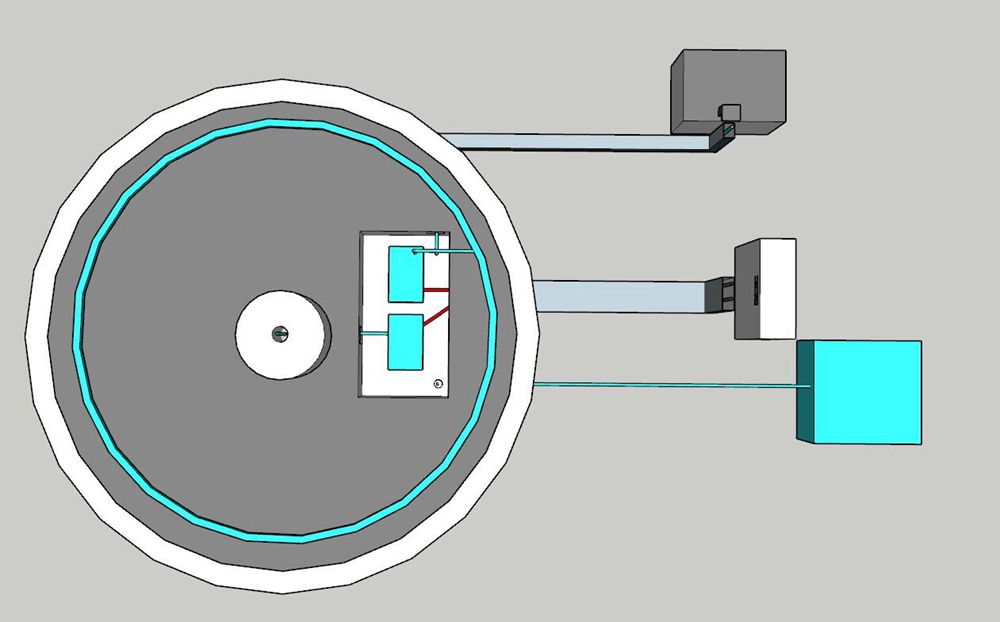
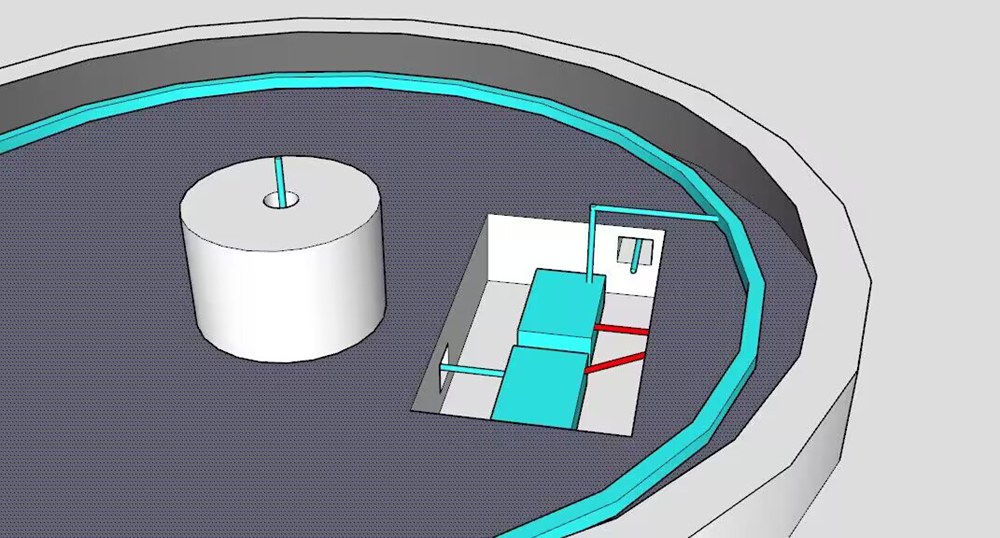
The alternative is to place the pump in a separate below-grade vault or valve box, set into the concrete pad just outside or beneath the basin footprint, with pipework running up into the fountain through a sleeve.
How it works:
- A concrete or precast plastic sump/vault is set during the foundation stage (this is why the plumbing rough-in has to happen before Step 1’s stone layout is finalized).
- The pump, along with its check valve, unions, and any filtration or UV equipment, sits in this accessible chamber, usually with a hinged lid at grade or hidden under a paver.
- Supply and return lines run underground to the fountain basin.
Comparison and Recommendation
| Method A: Inside the Column Base | Method B: Buried Vault Under Paving | |
| Pump location | Hidden cavity inside the column base, behind a removable access panel | Separate below-grade vault/valve box, outside or beneath the basin footprint |
| Best for | Small to mid-size fountains (roughly under 8 ft / 2.4 m diameter), single- or two-tier designs, low-flow needs | Large, multi-tier fountains, multiple jets or a tall center spout, high-head/high-flow pump needs |
| Pump size limit | Limited by cavity size — only fits low-flow pumps (~1/4–1/3 HP) | No practical size limit — can fit any pump the design needs |
| Site conditions | Ideal on hard surfaces (patio, plaza, rooftop) where digging a pit isn’t possible | Requires excavation and rough-in during the foundation stage |
| Serviceability | Very easy — just lift the access stone/panel | Easy, but requires planning the vault lid into the hardscape layout |
| Appearance | Very clean — no visible equipment, shortest plumbing run | Equipment fully hidden underground, away from the stone entirely |
| Added equipment (filtration, auto-fill, heater, UV) | Little to no room for extras | Easy to add a filtration/skimmer loop, auto-fill valve, or heater in the same vault |
| Cold-climate / freeze-thaw risk | Higher — if the seal fails, water can wick into the stone and freeze, cracking it | Lower — pump and lines can be drained and isolated separately from the stone |
| Heat/noise transmission | Somewhat contained but still transmits into the stone | Fully isolated from the fountain structure |
| Upfront planning | Minimal — works with the fountain’s built-in cavity | More — vault must be poured/sleeved before the fountain is set |
| Our recommendation | ✅ Best choice for smaller, simpler installations | ✅ Best choice for large, complex, or cold-climate installations |
Rule of thumb from the yard: if the fountain’s overall diameter is under about 8 feet and it’s a single or double tier, the internal-cavity pump is usually enough and looks cleaner. Once you’re building anything close to our largest layouts — wide multi-lobed basins with scroll brackets, shell basins, and a tall three-tier column — plan for a buried vault from day one.
Step 5: Plumbing, Wiring, and Sealing
Whichever pump method you choose, a few details apply to both:
- Use flexible, UV-stable tubing for the final connections at the pump and at each spout, so future maintenance doesn’t require breaking a rigid joint.
- Route the electrical supply through a GFCI-protected outdoor circuit, and always test continuity and insulation resistance before backfilling or closing any access panel.
- Seal every stone joint that will be in contact with standing water using a breathable, water-resistant stone sealant — this protects against staining and efflorescence far more than it does against actual leaks, which should be handled at the plumbing level, not by hoping the stone joint holds water.
Step 6: Fill, Test, and Adjust
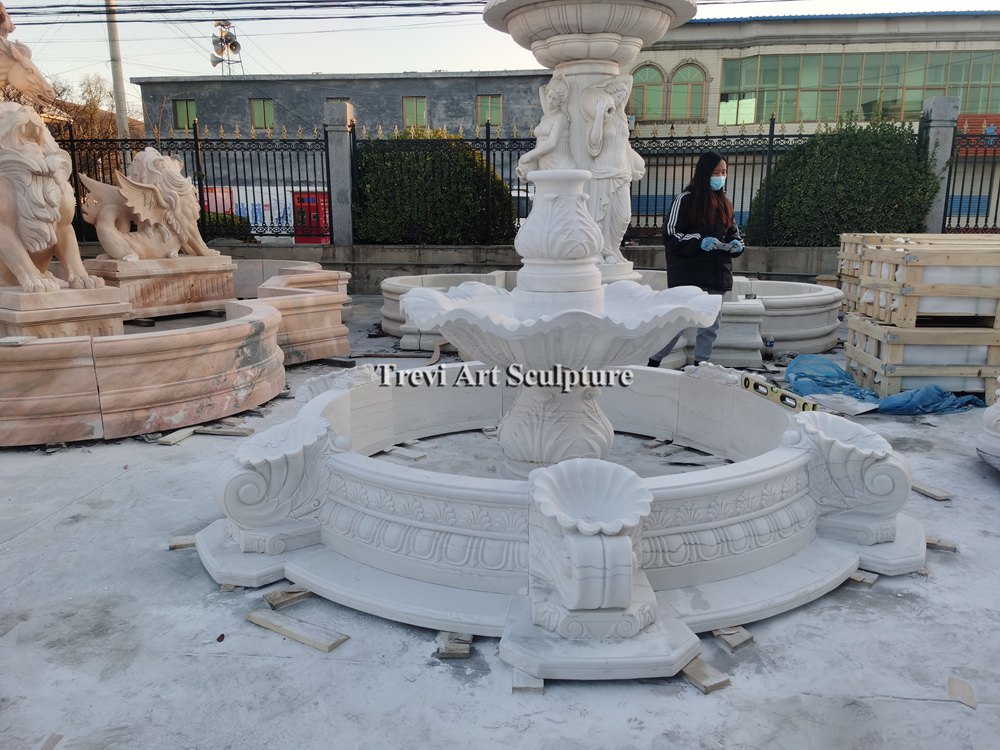
Fill the basin slowly and check every joint and the underside of the access panel for seepage before letting the pump run continuously. Run the pump for a few hours, check the flow pattern at each spout or overflow lip, and adjust any flow-control valves so the water sheets evenly over basin edges rather than splashing outside the footprint — this is also the point where you’ll notice if a segment was set slightly out of level, since water always finds the low point first.
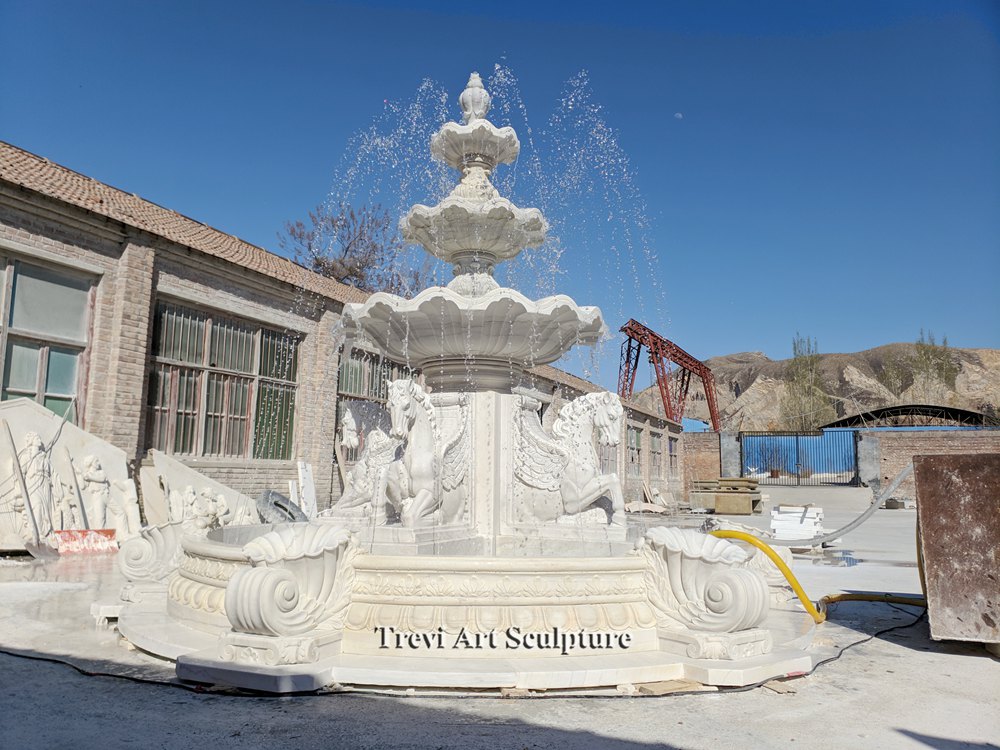
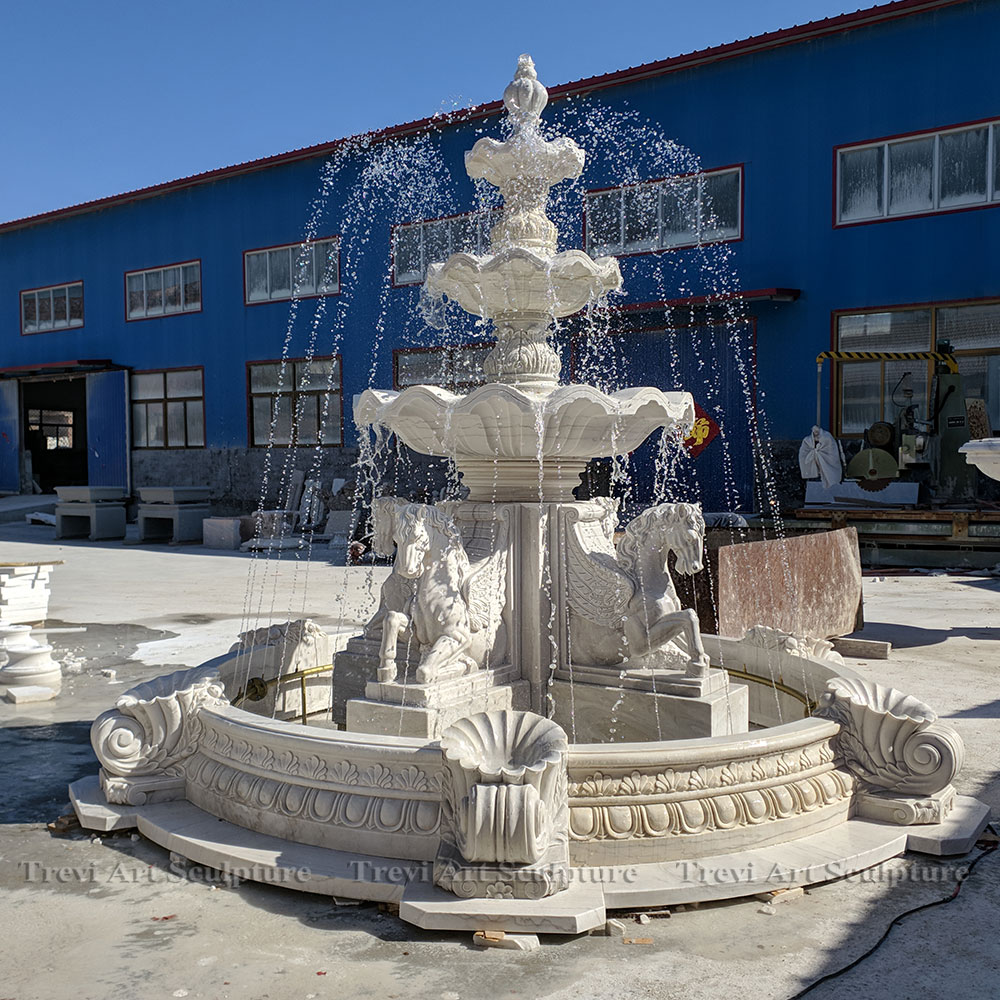
A marble fountain installation really comes down to three things: a true, level foundation; solid, doweled stone-to-stone joints; and a pump system sized and located correctly for the fountain’s scale. Get those three right, and a well-carved marble fountain will run reliably for decades — which, after all, is the whole point of building it in stone in the first place.